|
FULL DAY
NISBET FOREST CROSS COUNTRY
TOURS
|
|
 |
|
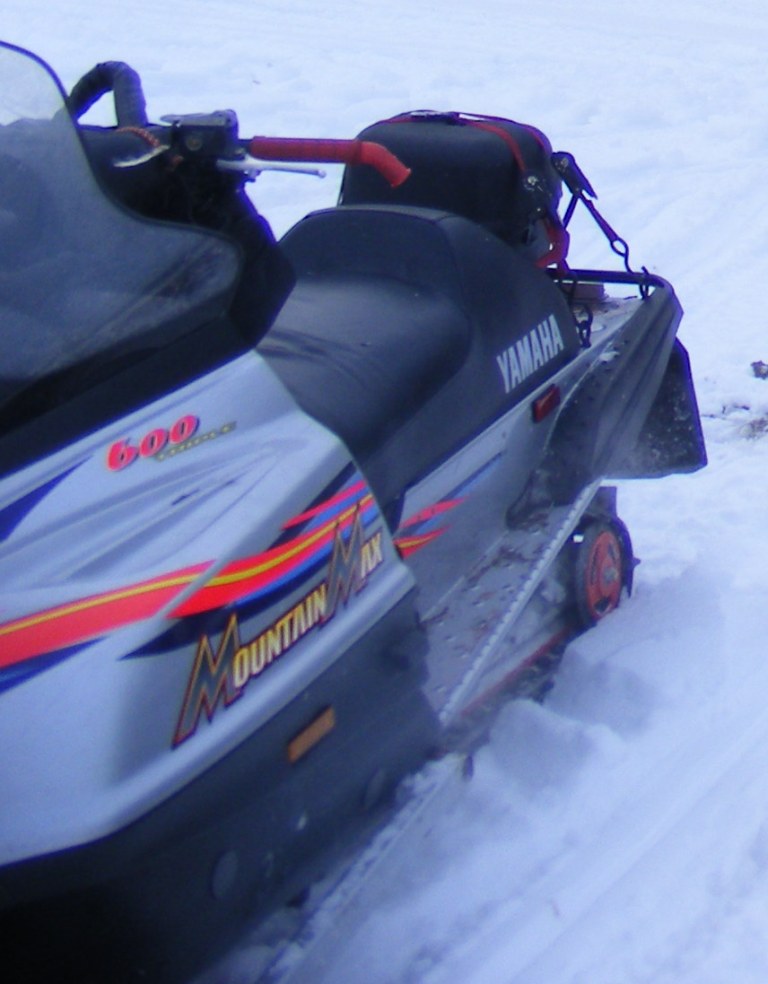
2015 YAMAHA
MOUNTAIN MAX 600 TRIPLE
This 600 TRIPLE
is *dynoed by Rich Daly to have very close to 100 HP .
This Mountain Max is published to weight about 511 Lbs. The
reverse kit we added would add a couple Lbs. The original track is a 141 x 15 with an advertised
2" lug, This track was really good providing unreal
traction IE: my trip leading down thru the trees into the valley
15-05. We have changed this track to a 141"x 1.1". This allows
us to use a larger diameter driver and out in the prairies
she will not hit a brick wall for top end speed. A medium lug track
this responsive 100 HP mill will get better mileage yet,
and will still make a great trail breaker thru the tight NISBET FOREST trails.
101 HP mill make it a great trail breaker thru the tight NISBET FOREST trails.
But that is only half of the story...rarely is economy
discussed, expect bragging rights at every fuel stop!
Economy...we rarely
discuss fuel mileage at
SNOCRUISE
in the Saskatchewan prairies
because we ride such large variety of cross-country snow
conditions. We are more concerned with the relative location of
Small towns
with fuel service in our riding area. But under
archives we tabulate fuel usage
for fun at most stops. Look for an "F" added to the rides "Link"
on our "Archives page. Fuel mileage is usually best gauged on
consistent "groomed trail riding" conditions.
*Source
November 1998 American SNOWMOBILER magazine. |
|

20-13VF,
20-12VF, 20-10VF,
20-02F,
20-01F,
16-07
VF,
16-06,
16-02
F,
15-05
F,
15-03
F,
15-02
1) We Fire the
MM Up! and Switch Front Ends
2) CHAINCASE UPGRADE
to REVERSE and REPAIR
3) HANDLE BAR RISER, 45 DEGREE ENDS A SKID
PLATE and ICE SCRATCHERS
4)
FIRST RIDE...HOLY
HANNA!
5)
15-03 Duck Lake is
surrounded by the Bulls!
6)
15-05
The days mileage speaks for
it's self!
7)
16-02 F
Once again the days mileage speaks
for it's self!
8)
16-07VF
Flat out all day...this long track was in the number 2
spot every time I turned around to check!
9) Track
Change, here we go with scheduled lower drive bearing
maintenance.
10) A little
tweak in the front suspension with back to back rides to get the
feel and feedback. |
|
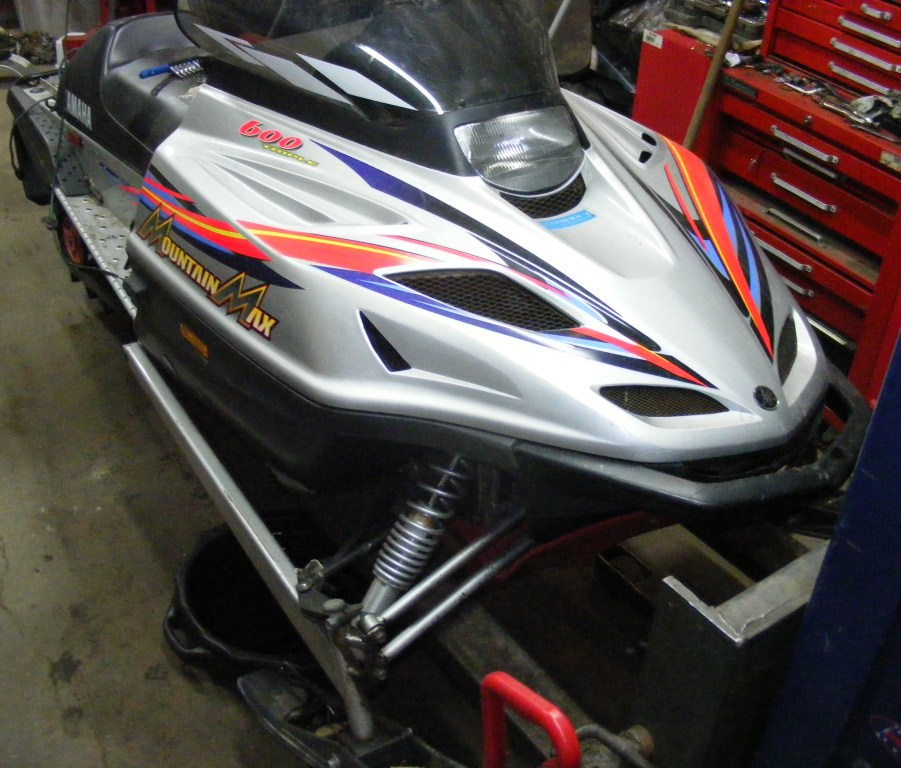
1) After
purchase we Fire the
MM Up!
and Switch Front Ends |
|
2)
CHAINCASE UPGRADE
to REVERSE and REPAIR
|

Lets pull the cover off and have a look
|

Spotless this assembly is in pristine
condition at 2700 Km, I plan to add a new chain just because.
|

With the reverse (pun intended) installation
nicely under way, every thing is really nice and clean, the
engagement side of this reverse idler looks good. |

Some evidence show that they just road the
sled that way, forward while the gear box selector was in the
reverse position and the gear box buzzing loudly! |
|

But it seems that the donor sled had several
deficiencies! We found that once engaged into reverse the
linkage was so sloppy because of the replacement of some
non-conforming bolts the sled refused to fully engage by just
buzz loudly.
|

This is evidence that the gear box buzzing
loudly whiles selected reverse actually was not fully engaged
into reverse was then put back into forward with the whole
assembly freewheeling yikes! Forward engagement cogs are
hammered on the edge.
|

This is the gears alignment when the reverse
is not actuated. |

This is the clearance between forward and the application of
reverse. Any worn parts or linkage would allow the gears to slip
out of reverse under pressure. |

The shift forks were worn half away from the constant
pressure of been left in reverse for a long time.

The We had the shift forks welded back up then roughly ground
round again.

|

This shows the reverser engaged by hand and
more fully engaged than what the forks would move the cluster
over to disengage the forward engagement cogs and engage the
reverse idlers. |

This is the reverse process.
1. Power enters via secondary
clutch to jackshaft to drive the drive sprocket.
2.The drive
chain rotates in a clock wise direction following the
tensioner and around the bottom sprocket.
3.
The "HAND" or shift fork
engages the shift cluster disengaging its forward engagement
cogs, and while engaging the reverser idler.
4. The
reverser idler engaged and running "COUNTER CLOCKWISE"
5.The gear
cluster in reverse or counter clockwise.
6.Which is now driving
the track drive shaft by a set of
splines which are partly visible between the cluster and bottom
sprocket. |

Walla! A reverse gear box ready
for the shift fork cover and oil etc!
|
|
|
3)
HANDLE BAR RISER, 45 DEGREE ENDS A SKID
PLATE and ICE SCRATCHERS

This raising the handle bars a couple inches
is one small miracle to rider comfort on a domestically designed
snowmobile. |

Adding a couple 45 degree hooks is big, and you don't notice how
nice they are until they are missing. |

The skid plate is big here when you spend
a lot of time in the Nisbet backcountry. |

Toss in a Bow saw to compliment the chain saw on our next outing
and we are just about good to go!
|

Our ice scratcher install begins with
|

locating an area on the slide rail
|

where the ice scratcher can be mounted
|

in such a way that when not in use the scratcher has a resting
place that keeps it our of the rest of the suspensions moving
parts. |

It looks like removing a pair of forward idler wheels and
turning the mount around will free up some needed space along
the slide rail. |

If we mount this right the scratcher will rest on the slide rail
when not in use. |

So we carefully model and measure so a hole can be drilled for
mounting. |

The hole has to be mounted low enough so the tail end of the
spring actually will place some reasonable pressure when engaged
for groomed trail riding. |

If the mounting hole is in the right place we will not need a
second hole for the spring tail. |

Yup the hole once we verify this will work on this side we will
duplicate the hole on the other side. |

Mounted with some decent spring pressure.
|

Hanging on its own we have the spring pressing downward
considerable, catch some air like this and all should be good
and relative to the track direction. |

With the spring in its at rest not in use position we have taken
advantage of a recess in the slide rail near the rear ahead of
the rear scissor bumper stop. |

Nice
|

|

Notice We had flipped the mounts around and seeing the rear
idlers like that thought yea all is well... |
|

...not so the shock and assembly drops down in this centre area
at he front. |

A photo of the scratchers disengaged.
|

Replacement hardware instead of the mid idler brackets etc. |

A photo of the suspension from a rearward vantage point.
|
|
|
4)
FIRST RIDE...HOLY
HANNA!
I have no idea
what was really stopping the Mountain Max from revving
10,000RPM! Any throttle opening over 1/2 was seeing the
little triple wound to 9,500RPM! Acceleration was ho hum, I
never even tried for any reverence to really see actual top
end...I saw 100 to 110kph on a couple occasions when I held the
flipper down on the lake for a excruciating few extra seconds! And handling...she just
wanted to track kind of straight. The sled resisted turning, as
if that was the last thing on its agenda, hell lets just go
straight down the middle of the lake with absolutely no desire
to duck in and out of the little coves and bays full of powder.
I could just see it now, put "Joe average" on such a handling
sled and a snowmobile ride would be just that, a snowmobile
ride, no fun, no desire, to toss her around or lean her over and
try carve some banks. Combine the extreme high RPM and the
crappy handling I can only imagine that all you would be
thinking is "God I wish this ride was over" or "God why did I
ever buy a snowmobile!"
I can barely
believe the original owner put 2750 KM's on her! (1705miles)
Prior to riding it I actually wondered how you could own such a
nice looking and sounding piece of equipment for 14 going on 15
years and have only 1700 milers on it, as a group there is a few
of us that have put on over 300 miles in a day and that was
riding cross-country meadows, bush land and fields!
LOTS OF
ADJUSTING TO DO LET THE GAMES BEGIN!
|

First item on the agenda was
replace the primary clutch spring with one known to work well.
The original clutch
spring was a YWY We have an OEM YGY in our
600 Triple Deluxe.
|

I see on
Totally Yamaha's site and thru parts look up sites that the 600
SX another 121 short track also uses this spring. We like the
way our 600 Deluxe works so that is the direction taken. |

A look at the weights and we see this is all stock Mountain Max,
wow this thing is clutched for a different planet!
|

In the above photo I put a caliper on the
rollers. There are several different diameters and we just want
to verify which ones are in here.
|

We put a fish scale on the
secondary. |

I grab a collection of secondarys to take with us on the next
ride. |
|
|

When this sled was acquired a close examination revealed a track
that was "hamstring" tight. Looking closely it we see many small
cracks in the exterior layer of rubber. Worrisome, but so far so
good 300+ Kms later and nothing has let go! |

The front straps were "all the way out" which allowed the
suspension to Torque the whole chassis including the skis up
into the air under any form of acceleration or normal
application of power. |

When Hanging in the air, the front slide rails just make contact
with the cement floor.
 |

The difference mathematically is the front straps pulled all the
way in, and YES pulled all the way in, so you can attempt to
feel the difference in the most defined way, for good or for
bad.
 |
|
How is the
average person supposed to feel or realize a very minute change.

The rails all the way out at 9 1/4", the
difference to 7 7/8" is a change
of 1 3/8"
 |

Every outing costs a lot of money
and there is no sense making minute little changes to a sled
just to pound hundreds of dollars of fuel and depreciation into
the sled for nothing. |

The front straps now "all the way
in" which restricts the suspension to Torque the whole
chassis including the skis up into the air under any form of
acceleration or normal application of power. |
With more ski
pressure the sled should drive completely different.

|
|
|
5)
15-03 Duck Lake is
surrounded by the Bulls!.
Acceleration was much better! You could actually sense that the
sled was accelerating when you put the flipper down!. And
handling...There has been a drastic change in the sleds
handling. Now the sled is fun to ride you can turn and maneuver
in and out of the snow, NIGHT & DAY! Would "Joe average"
know the difference? Maybe not, not unless he had back to back
rides on the sled.
Was the sled
still over revving ? Yes I would see around 9,200 and holding,
we are getting closer! I am still not inclined to "hold her to
the pin for any length of time". Although the weights in the
primary clutch were the same, the rivets added by Yamaha were
different. The outside rivets ( two in each weight) were lighter
in the MM version vs. the SX or Deluxe version of the sled. Next
mod change the weight of the weights by swapping in heavy
outside rivets.
|
|
6)
15-05
The days mileage speaks for
it's self!
A little flash
to 9,000 off an aggressive start then as soon as you were
rolling she would back up and the RPM would settle down to
8,500! Perfect for a day of riding in the Nisbet!
And sounds nice cruising at
6-7,000RPM the triple sounds fantastic...when will the OEMs
build a E.O.G.&F. (easy on gas & fumes) triple? When they build
one people will flock back to the sport in big numbers just for
the sound!
Speaking of fuel this sled on its second outing used half the
fuel from the first under similar KM's. On this day 15-05 The
sled ran 183KMS and was still registering ...
Loaded up with
the chainsaw and all the fixings this sled now accelerates
really well! Enough to get you in trouble in a big hurry if you
are not paying attention!
|
|
|
7)
16-02 F
Once again the days mileage speaks
for it's self!
A little flash
to 9,000 off an aggressive start then as soon as you were
rolling she would back up and the RPM would settle down to
8,500! Perfect for a day of riding in the Nisbet!
And sounds nice cruising at
6-7,000RPM the triple sounds fantastic...when will the OEMs
build a E.O.G.&F. (easy on gas & fumes) triple? When they
build one people will flock back to the sport in big numbers
just for the sound!
On this day 16-02 she carried the chain saw and was our
work horse.
Loaded up with
the chainsaw and all the fixings this sled now accelerates
really well! Enough to get you in trouble in a big hurry if you
are not paying attention!
|
8)
16-07VF
Flat out all day...this long track was in the number 2
spot every time I turned around to check!
You can see the monster rooster tail of
snow flying up behind this sled in the videos. Gonna
change that. Across the prairie and around on the small
lake, but it was evident she was up against a brick wall
for top end.
|
9) Track
Change, here we go with scheduled lower drive bearing maintenance.
In the off season...#9 we have a lower
drive bearing change across the board and while we are in
there...install a
1.1" track for more top end. There is still great
floatation!

Getting started this is track change is
going to be merged with fleet maintenance. |

|

There is no telling how long this
stick was trapped up in the tunnel. |

 |

The 1.1" we are installing is going to carry a
lot less snow. This should improve cruising speed in the
prairies. |

There is a big difference in driver diameter. Larger
diameter driver=less rolling
resistance. |

I used some sockets to space the drivers I had to push
onto a spare drive shaft.
|

The Yamaha uses a "o"
ringed bushing to seal the bearing from the snow.

The lower chaincase
bearing is fine. It just needs grease. |

This was this seasons scheduled
maintenance on all our sleds, repacking all the speedo
side drive bearings.

This one was seized on and a real bear to remove!! |

Pound all the seals nice and flat with a mallet. The
seals usually get a little bent pulling them out. I did
not use the "ball peen" happening to be on the bench in
this picture! |

The chaincase lower bearing is repacked.
|

Here we are with some correctly sized track clips.

I was pretty surprised at how many track clips this
used, otherwise good track needed.
|
|
10) A little
tweaking, I make a minor sounding adjustment and get big
results. That's what it is all about from a motor head
perspective.
Set up for carrying the chain saw I strap on the axe and we
use this Max for our bush whacking and exploration. The 1.1
is clearly the way to go,
Maximus
acceleration, speed, just a couple adjectives
to throw out there.
Now for some front end
adjustments not that evident in the first couple rides of
the winter, but now that we have really good snow......I
notice something is amiss, I made the same adjustment to our
Blue Max... with the same great results.

20-12VF
As assembled as our project sled
in 2015 I felt I could make the sled feel more positive
and playful just by cranking the front end up, a couple
inches. |
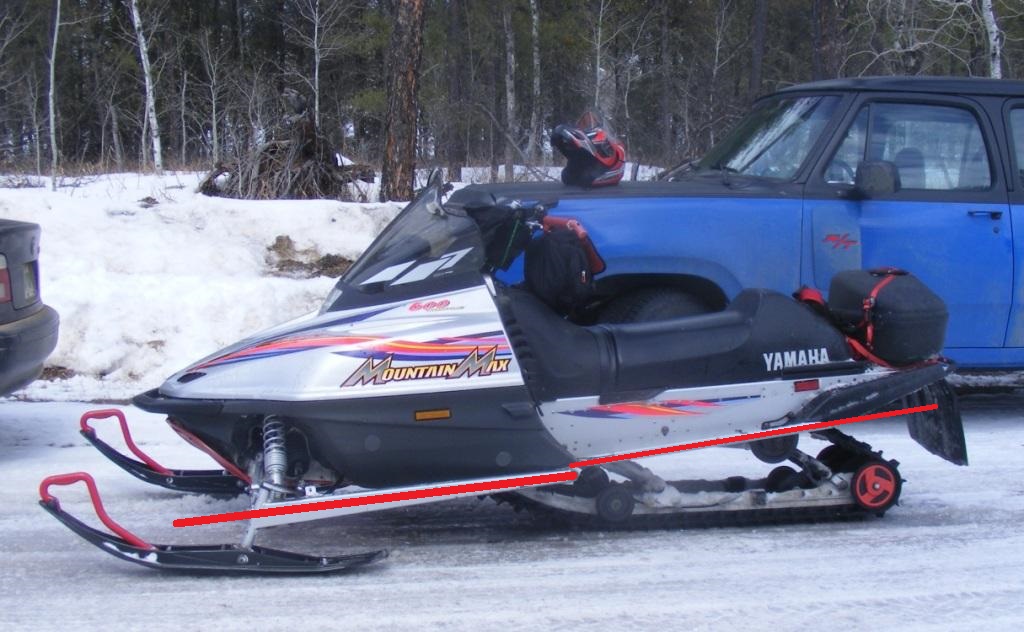
20-13VF
At a glance the parallelism between the trailing arm to
the tunnel is obvious to the motor heads eye....The 2
inch (or so) crank up on the variable rate front springs
has made a big difference in stability and steering
control, more steer...she steers....and you ride 'er
with more a more positive confidence.
It doesn't hurt that
these sleds look a bit better with the trailing arm and
tunnel alignment. |
|
|